|
Diamond Tweed Frame Tutorial
Tutorial by Storme
Designs.
<><><><><><><><><><><><><><><><><>
You will need only
Paint Shop
Pro, a graphic and
the
Redfield
Jama Filter. The Jama filter is freeware and
you can
download it at the site.
This tutorial assumes you have some
knowledge of PSP.
It was created in
Paint Shop 7.
<><><><><><><><><><><><><><><><><>
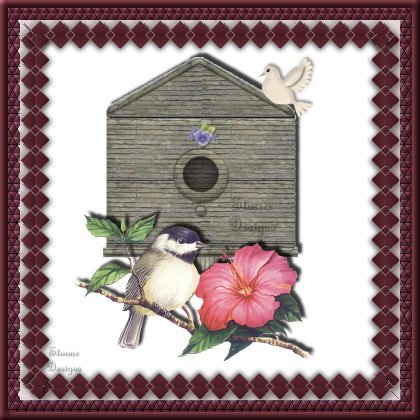
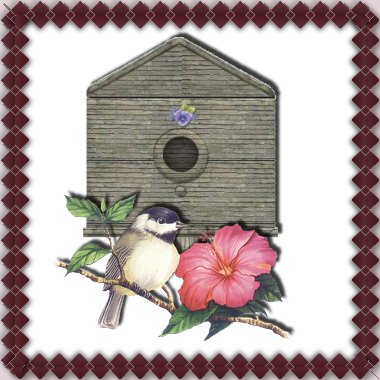
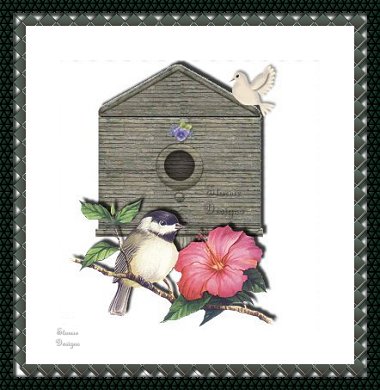
I was making the Scalloped Shadow Frame and
tried
playing with the diamond section of the filter.
What turned out
is above and that is the design we will be
creating.
It takes a little time, but worth it, if you
want to make
your own creation.
<><><><><><><><><><><><><><><><><>
Please save your graphic often as you work in case
your
computer shuts down for any reason.
<><><><><><><><><><><><><><><><><>
First choose your graphic.
Choose your graphic, then hit you
shift and D key together to make
a duplicate of your picture and
close your original. This keeps your
original unaltered for future use.
You could also copy and paste
as a new image.
<><><><><><><><><><><><><><><><><>
I usually select colors from the graphic for my
border, but
in this case the border is from another picture
I was originally
creating for the other tute! The size you make
your frame is
up to you. Mine started at about
400x400. This design cannot
be perfect, due to the plug-in used, but
gives a nice effect. If you
have a steadier hand, you may make it better.
You also want
room for the diamond border on the edge
of your picture. If
you don't have room on the graphic you
chose, you could
increase your
canvas size.
<><><><><><><><><><><><><><><><><>
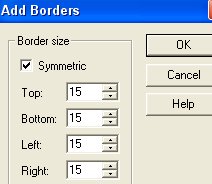
Once you have your color choice set, click
on Image and
Add Borders. I chose size 15.
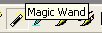
Next select your border with your
magic wand.
Now go to Effects, Plug-ins and
choose Jama 3d. Click
on the bottom box, where it says
Last used on the graphic
below and select Tesselation and
click on the Apply button
accepting the default settings.
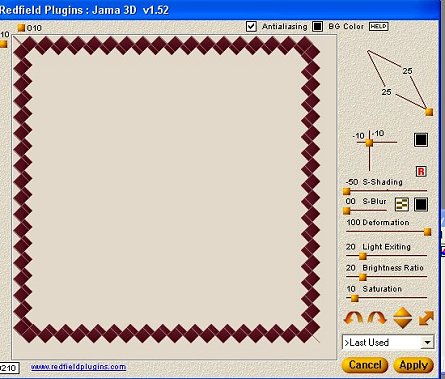
Your border will look like below.
Now click on your magic wand again.
You can leave the light triangle as
is or floodfill it with a
matching color.
Hold down your shift key and select
each outer triangle.
The outer one usually comes out
with a lighter color.
If you select a part of your
graphic by mistake, just go to
edit, undo and undo and re-select.
Now with the lighter
triangles all selected floor fill
with a lighter matching color to
your darker triangles. Next,
we do the same selecting
with the dark triangles
remaining. Once they are all
selected, go to edit, copy and
paste as a new image.
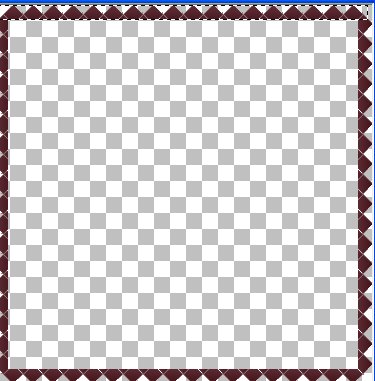
Your graphic should look like the
one below, but without
the dashes on the top.
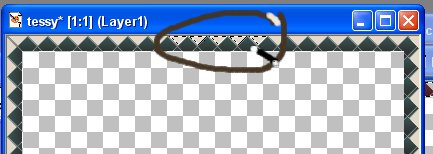
Next click on your selection tool
set to rectangle as below,
select the top border triangles of
your frame.

Go to edit, copy and paste them as a new layer
on your triangles.
Go to image, click on flip and now line them up
to create diamonds,
You want them to look like below, when lined
up.

You repeat this with all 4 sides. You can
erase any part
of the frame you don't like. Once lined up copy
and
paste it to your original picture.
Don't forget to save as you go. The hard
part is over
and you are nearly finished!
You can leave it or apply a drop shadow, which
I always
think enhances most work. Go to Effects,
3D and click on
Drop Shadow. I applied the below shadow.
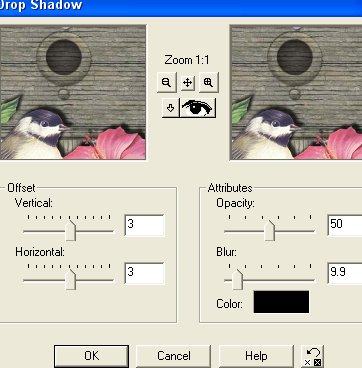
vertical and horizontal set to 3 and opacity at
50
with a blue of 9.9. You can vary your
settings as needed.
You can accept black as your color or a very
dark color of
your frame. Click on Drop Shadow again
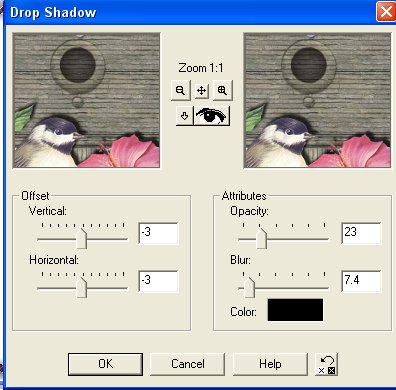
For this drop shadow, we use -3 for
vertical and horizontal, 23
for opacity and 7.4 for blur. The
color can be black or a dark
color from the border.
You can leave as is or add the next
border.
<><><><><><><><><><><><><><><><><>
Now we are going to add one more border.
Go to Image,
add Border with the size you would like.
I think I chose
about 10 and or 15 for these. Click on
your magic wand and
select your new border. Go to Effects, Texture
Effects, Tile
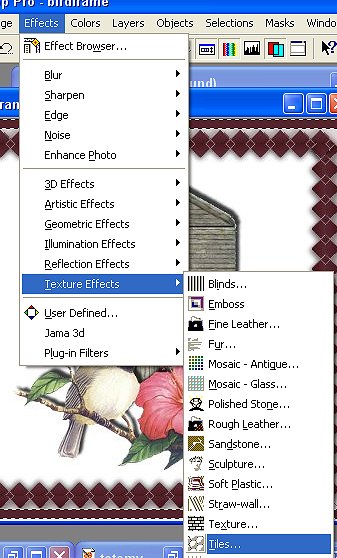
Tiles. Click on Tiles and use the
settings as below.
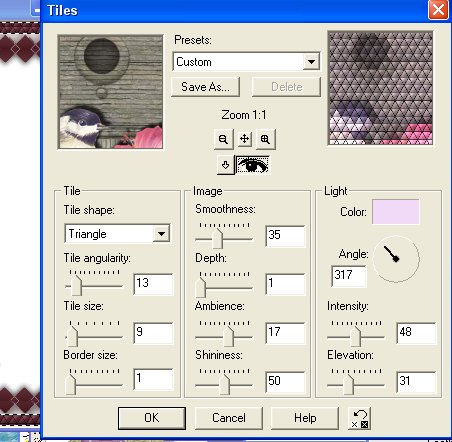
Tile shape is triangle, angularity is 13, tile
size is 9, border size is 1,
smoothness is 35, depth is 1, ambience is 17,
shininess is 50, my color was a
medium pink, angle is 317, intensity is 48 and
elevation is 31.
You can leave as is or add an inner bevel as I
did.
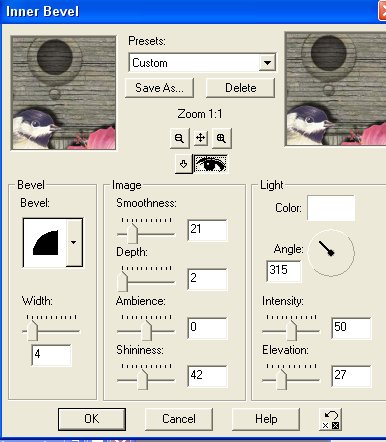
I used the round setting, with a width of 4,
smoothness 21,
depth 2, ambience 0, shiniess 42, color is
white, angle 315,
intensity 50 and elevation 27.
You're done! Hope you enjoyed it!
<><><><><><><><><><><><><><><><><>
If you notice anything that needs correcting,
because I
did the tute days after I did the frame, just
let me know.
Would love to hear from you too, if you tried
it or
any of the other tutes!
<><><><><><><><><><><><><><><><><>
Below was done without adding the triangles for
the diamond look.
Just applied a drop shadow and the outer
border.
Check our main Tutorial page for new
Tutorial listings at
Storme
Millennium Tutorials.
<><><><><><><><><><><><><><><><><>
This tutorial can be copied intact without the
backgrounds with
credit to Storme Designs,
The web page background set cannot be copied
without permission.
http://mystyqcat.tripod.com/
<><><><><><><><><><><><><><><><><>
We have a new Descriptive Index of our
Tutorials at
Tutorials.
Our Site Index is at
Storme Millennium Index.
<><><><><><><><><><><><><><><><><>
[TearDrop
Adoptions][Holiday
Quilt][Anniversary][Autumn][Realtor][Quilt][Quilt
Exchange]
[Library][Home][Parlor][Gifts][StPat][Vacations][Care][Study][Help][Shelf][Adoptions]
[Cat] [Web
Page services links][Millennium][Ocean
Ring][Help
Links][Garden][Add
link]
[Game][Stars
n Stripes Porch][Condo][MadCat
Pad][Graphics][Haunted
Courthouse][Knot]
[Care][Birthday][Valentine
Quilt2][Hostess][Banners][Newyear][GOF
Blossoms][Stratford]
[Name
Quilt2][GOF
Anniversary04][Valentine
Quilt][Name
Quilt][GOF
GalleryII][Celebrity]
[GOF
gallery][GOF
Birthday][Garden
Quilt][GOF
angels][Island][Snow][Ring][MahJong]
[Samples][Hugs][Lounge][Furship
Lodge][AdoptionPorch][Anniversary][Balcony][Welfare]
[Den][Designs][Halloween][Quilt2][Millennium][Quilt3][Loft][Tutorials][Fireworks][Lists]
[Award][Links][Island2][Cards][Garden
Friends][Gof
Birthday][Condo][tutorial
index]
[GraphicII] [Index][Postcards][Loft]
|